Upload Images Azure Blob Net Core Entity Framework Transaction
This browser is no longer supported.
Upgrade to Microsoft Border to have advantage of the latest features, security updates, and technical support.
Tutorial: Utilise .NET and AI to generate searchable content from Azure blobs
If you have unstructured text or images in Azure Blob Storage, an AI enrichment pipeline can extract information and create new content for full-text search or knowledge mining scenarios.
In this C# tutorial, yous volition learn how to:
- Fix a development environment.
- Define a pipeline that uses OCR, language detection, entity recognition, and primal phrase extraction.
- Execute the pipeline to invoke transformations, and to create and load a search alphabetize.
- Explore results using full text search and a rich query syntax.
If you don't have an Azure subscription, open a complimentary account before you begin.
Overview
This tutorial uses C# and the Azure.Search.Documents client library to create a information source, index, indexer, and skillset.
The indexer connects to sample data in a blob container that's specified in the data source object, and sends all enriched content to a search index.
The skillset is attached to the indexer. It uses congenital-in skills from Microsoft to find and extract information. Steps in the pipeline include Optical Graphic symbol Recognition (OCR) on images, language detection on text, key phrase extraction, and entity recognition (organizations). New data created by the pipeline is stored in new fields in an index. Once the index is populated, yous can use the fields in queries, facets, and filters.
Prerequisites
- Visual Studio
- Azure.Search.Documents 11.ten NuGet packet
- Azure Storage
- Azure Cognitive Search
- Sample data
Annotation
You can utilise the gratis search service for this tutorial. A gratis search service limits yous to three indexes, 3 indexers, and three data sources. This tutorial creates one of each. Earlier starting, brand certain you have room on your service to accept the new resources.
Download files
The sample data consists of fourteen files of mixed content type that y'all will upload to Azure Blob Storage in a later step.
-
Get the files from azure-search-sample-data/ai-enrichment-mixed-media/ and copy them to your local estimator.
-
Next, get the source code for this tutorial. Source code is in the tutorial-ai-enrichment/v11 binder in the azure-search-dotnet-samples repository.
one - Create services
This tutorial uses Azure Cognitive Search for indexing and queries, Cerebral Services on the backend for AI enrichment, and Azure Blob Storage to provide the data. This tutorial stays under the free allocation of 20 transactions per indexer per day on Cognitive Services, so the only services you need to create are search and storage.
If possible, create both in the same region and resource group for proximity and manageability. In practice, your Azure Storage business relationship tin be in any region.
Commencement with Azure Storage
-
Sign in to the Azure portal and click + Create Resources.
-
Search for storage business relationship and select Microsoft's Storage Account offering.

-
In the Basics tab, the following items are required. Accept the defaults for everything else.
-
Resource group. Select an existing one or create a new one, but use the aforementioned group for all services so that you lot tin can manage them collectively.
-
Storage account proper name. If you remember you might have multiple resources of the same type, apply the proper noun to disambiguate by type and region, for instance blobstoragewestus.
-
Location. If possible, cull the aforementioned location used for Azure Cognitive Search and Cognitive Services. A single location voids bandwidth charges.
-
Account Kind. Choose the default, StorageV2 (general purpose v2).
-
-
Select Review + Create to create the service.
-
Once it's created, select Go to the resource to open the Overview page.
-
Select Blobs service.
-
Select + Container to create a container and name it cog-search-demo.
-
Select cog-search-demo and so select Upload to open up the folder where you lot saved the download files. Select all of the files. Select Upload.

-
Before you leave Azure Storage, become a connexion string so that yous can codify a connection in Azure Cognitive Search.
-
Browse back to the Overview page of your storage account (we used blobstragewestus equally an example).
-
In the left navigation pane, select Admission keys and copy one of the connection strings.
The connectedness string is a URL like to the following example:
DefaultEndpointsProtocol=https;AccountName=cogsrchdemostorage;AccountKey=<your account central>;EndpointSuffix=core.windows.net -
-
Save the connection string to Notepad. Y'all'll need it afterward when setting upwards the data source connexion.
Cerebral Services
AI enrichment is backed by Cognitive Services, including Language service and Computer Vision for natural language and prototype processing. If your objective was to consummate an actual prototype or project, you lot would at this signal provision Cognitive Services (in the same region equally Azure Cognitive Search) and so that you can attach it to indexing operations.
For this do, however, yous tin can skip resource provisioning because Azure Cerebral Search can connect to Cognitive Services behind the scenes and give you lot 20 free transactions per indexer run. Since this tutorial uses 14 transactions, the free allocation is sufficient. For larger projects, plan on provisioning Cognitive Services at the pay-as-yous-go S0 tier. For more information, see Adhere Cognitive Services.
Azure Cognitive Search
The tertiary component is Azure Cognitive Search, which yous can create in the portal or find an existing search service in your subscription.
You tin can use the Gratis tier to complete this walkthrough.
Copy an admin api-key and URL for Azure Cognitive Search
To interact with your Azure Cognitive Search service you volition need the service URL and an access central.
-
Sign in to the Azure portal, and in your search service Overview folio, get the proper name of your search service. You can confirm your service name past reviewing the endpoint URL. If your endpoint URL were
https://mydemo.search.windows.cyberspace, your service proper noun would existmydemo. -
In Settings > Keys, go an admin key for full rights on the service. You tin copy either the master or secondary cardinal.
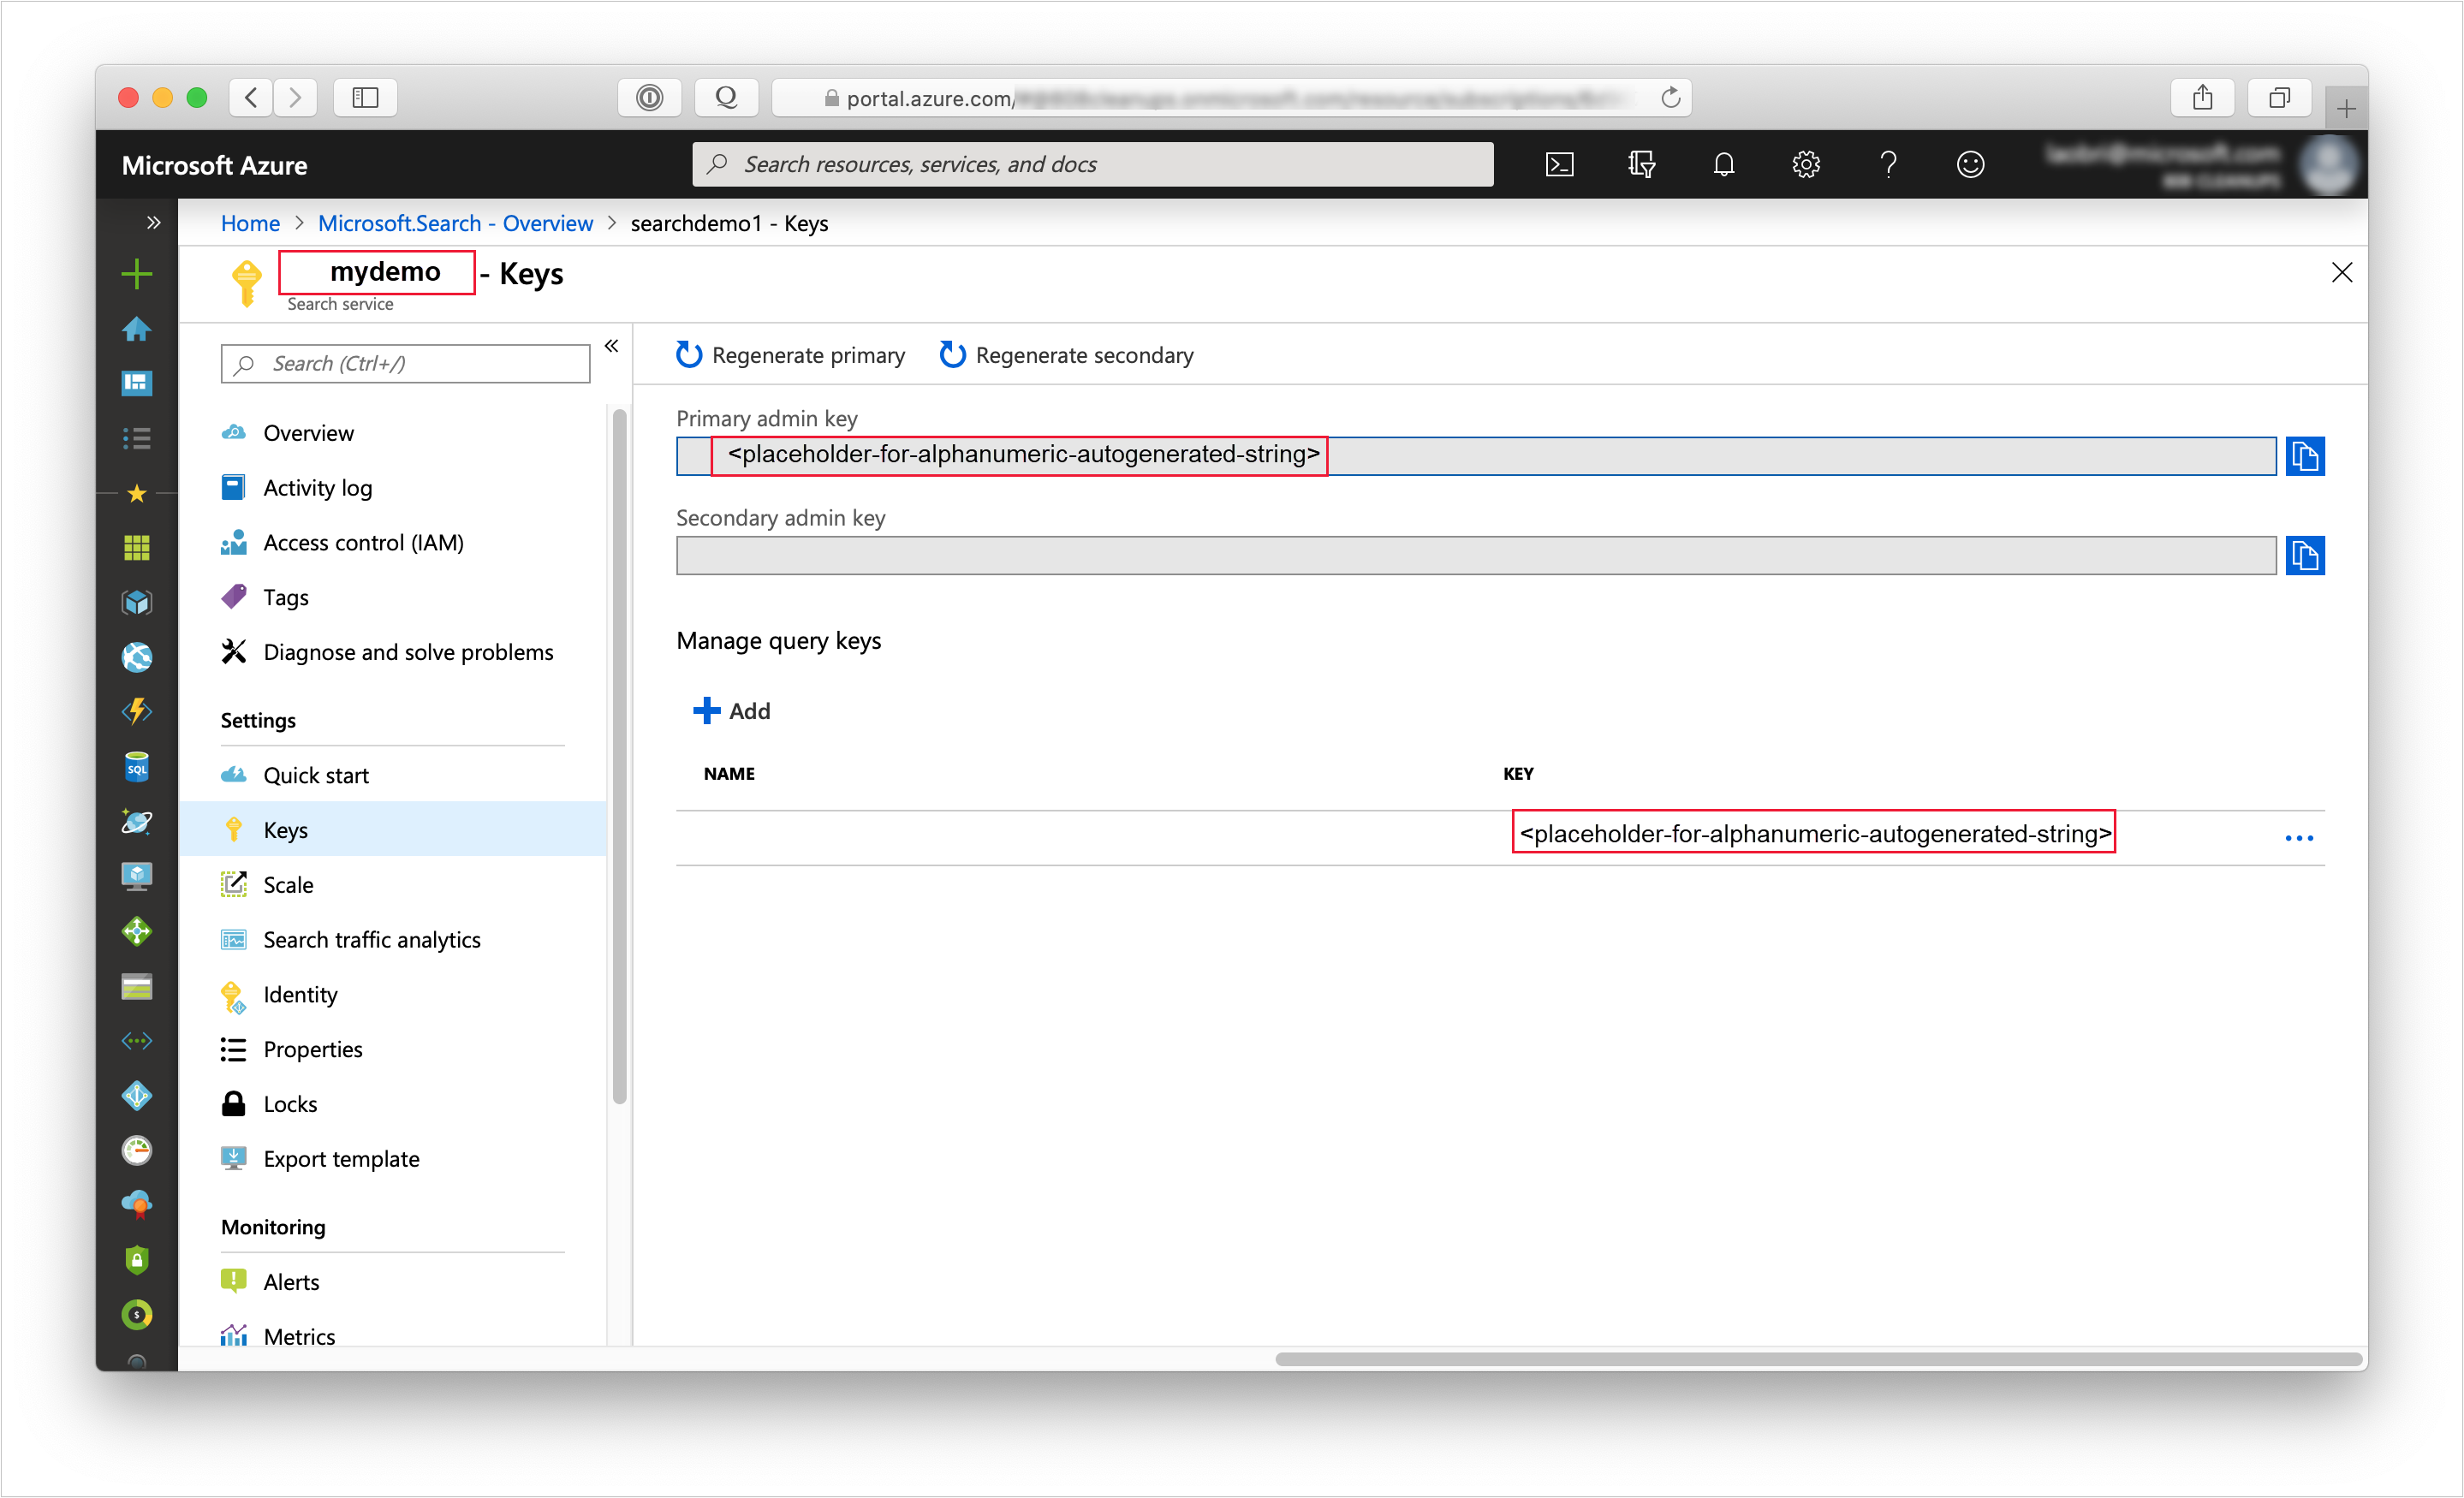
Having a valid fundamental establishes trust, on a per asking basis, between the application sending the request and the service that handles it.
ii - Fix your environment
Brainstorm past opening Visual Studio and creating a new Panel App project that can run on .Net Cadre.
Install Azure.Search.Documents
The Azure Cerebral Search .NET SDK consists of a customer library that enables you to manage your indexes, data sources, indexers, and skillsets, likewise as upload and manage documents and execute queries, all without having to deal with the details of HTTP and JSON. This client library is distributed as a NuGet package.
For this project, install version 11 or afterward of the Azure.Search.Documents and the latest version of Microsoft.Extensions.Configuration.
-
In Visual Studio, select Tools > NuGet Bundle Managing director > Manage NuGet Packages for Solution...
-
Scan for Azure.Search.Document.
-
Select the latest version and and then click Install.
-
Repeat the previous steps to install Microsoft.Extensions.Configuration and Microsoft.Extensions.Configuration.Json.
Add together service connection information
-
Right-click on your projection in the Solution Explorer and select Add > New Particular... .
-
Name the file
appsettings.jsonand select Add. -
Include this file in your output directory.
- Right-click on
appsettings.jsonand select Properties. - Change the value of Copy to Output Directory to Copy if newer.
- Right-click on
-
Re-create the below JSON into your new JSON file.
{ "SearchServiceUri": "Put your search service URI here", "SearchServiceAdminApiKey": "Put your primary or secondary API cardinal hither", "SearchServiceQueryApiKey": "Put your query API primal hither", "AzureBlobConnectionString": "Put your Azure Blob connectedness string here", }
Add together your search service and hulk storage account data. Recall that you can go this information from the service provisioning steps indicated in the previous section.
For SearchServiceUri, enter the total URL.
Add namespaces
In Plan.cs, add the following namespaces.
using Azure; using Azure.Search.Documents.Indexes; using Azure.Search.Documents.Indexes.Models; using Microsoft.Extensions.Configuration; using System; using System.Collections.Generic; using Organization.Linq; namespace EnrichwithAI Create a client
Create an instance of a SearchIndexClient and a SearchIndexerClient under Main.
public static void Main(string[] args) { // Create service client IConfigurationBuilder builder = new ConfigurationBuilder().AddJsonFile("appsettings.json"); IConfigurationRoot configuration = architect.Build(); string searchServiceUri = configuration["SearchServiceUri"]; string adminApiKey = configuration["SearchServiceAdminApiKey"]; string cognitiveServicesKey = configuration["CognitiveServicesKey"]; SearchIndexClient indexClient = new SearchIndexClient(new Uri(searchServiceUri), new AzureKeyCredential(adminApiKey)); SearchIndexerClient indexerClient = new SearchIndexerClient(new Uri(searchServiceUri), new AzureKeyCredential(adminApiKey)); } Note
The clients connect to your search service. In social club to avert opening too many connections, y'all should try to share a single instance in your application if possible. The methods are thread-safe to enable such sharing.
Add part to exit the program during failure
This tutorial is meant to assist you understand each step of the indexing pipeline. If there is a critical consequence that prevents the program from creating the data source, skillset, index, or indexer the programme will output the fault message and exit so that the issue can exist understood and addressed.
Add ExitProgram to Chief to handle scenarios that require the program to exit.
private static void ExitProgram(string message) { Panel.WriteLine("{0}", message); Panel.WriteLine("Press whatever key to go out the program..."); Console.ReadKey(); Environment.Leave(0); } iii - Create the pipeline
In Azure Cognitive Search, AI processing occurs during indexing (or data ingestion). This part of the walkthrough creates four objects: data source, alphabetize definition, skillset, indexer.
Pace 1: Create a data source
SearchIndexerClient has a DataSourceName belongings that you can set to a SearchIndexerDataSourceConnection object. This object provides all the methods you need to create, list, update, or delete Azure Cerebral Search data sources.
Create a new SearchIndexerDataSourceConnection instance by calling indexerClient.CreateOrUpdateDataSourceConnection(dataSource). The following code creates a data source of type AzureBlob.
individual static SearchIndexerDataSourceConnection CreateOrUpdateDataSource(SearchIndexerClient indexerClient, IConfigurationRoot configuration) { SearchIndexerDataSourceConnection dataSource = new SearchIndexerDataSourceConnection( proper noun: "demodata", blazon: SearchIndexerDataSourceType.AzureBlob, connectionString: configuration["AzureBlobConnectionString"], container: new SearchIndexerDataContainer("cog-search-demo")) { Description = "Demo files to demonstrate cognitive search capabilities." }; // The data source does not need to be deleted if it was already created // since we are using the CreateOrUpdate method attempt { indexerClient.CreateOrUpdateDataSourceConnection(dataSource); } grab (Exception ex) { Console.WriteLine("Failed to create or update the information source\n Exception message: {0}\due north", ex.Message); ExitProgram("Cannot proceed without a data source"); } render dataSource; } For a successful request, the method will return the data source that was created. If there is a problem with the request, such as an invalid parameter, the method will throw an exception.
Now add a line in Chief to call the CreateOrUpdateDataSource part that yous've only added.
// Create or Update the data source Panel.WriteLine("Creating or updating the data source..."); SearchIndexerDataSourceConnection dataSource = CreateOrUpdateDataSource(indexerClient, configuration); Build and run the solution. Since this is your offset request, check the Azure portal to ostend the data source was created in Azure Cerebral Search. On the search service overview page, verify the Data Sources list has a new item. You might need to wait a few minutes for the portal folio to refresh.

Step 2: Create a skillset
In this section, you lot ascertain a set up of enrichment steps that you want to utilise to your data. Each enrichment stride is chosen a skill and the gear up of enrichment steps, a skillset. This tutorial uses built-in cerebral skills for the skillset:
-
Optical Character Recognition to recognize printed and handwritten text in image files.
-
Text Merger to consolidate text from a collection of fields into a single "merged content" field.
-
Language Detection to identify the content's language.
-
Entity Recognition for extracting the names of organizations from content in the blob container.
-
Text Split to break large content into smaller chunks before calling the central phrase extraction skill and the entity recognition skill. Key phrase extraction and entity recognition accept inputs of 50,000 characters or less. A few of the sample files need splitting up to fit within this limit.
-
Cardinal Phrase Extraction to pull out the top key phrases.
During initial processing, Azure Cognitive Search cracks each document to extract content from unlike file formats. Text originating in the source file is placed into a generated content field, 1 for each document. As such, set the input as "/document/content" to use this text. Image content is placed into a generated normalized_images field, specified in a skillset as /document/normalized_images/*.
Outputs can be mapped to an index, used as input to a downstream skill, or both as is the case with language code. In the index, a language code is useful for filtering. As an input, language code is used by text analysis skills to inform the linguistic rules effectually word breaking.
For more information about skillset fundamentals, see How to ascertain a skillset.
OCR skill
The OcrSkill extracts text from images. This skill assumes that a normalized_images field exists. To generate this field, later in the tutorial we'll set up the "imageAction" configuration in the indexer definition to "generateNormalizedImages".
private static OcrSkill CreateOcrSkill() { List<InputFieldMappingEntry> inputMappings = new List<InputFieldMappingEntry>(); inputMappings.Add(new InputFieldMappingEntry("image") { Source = "/document/normalized_images/*" }); List<OutputFieldMappingEntry> outputMappings = new List<OutputFieldMappingEntry>(); outputMappings.Add(new OutputFieldMappingEntry("text") { TargetName = "text" }); OcrSkill ocrSkill = new OcrSkill(inputMappings, outputMappings) { Clarification = "Extract text (patently and structured) from image", Context = "/certificate/normalized_images/*", DefaultLanguageCode = OcrSkillLanguage.En, ShouldDetectOrientation = true }; return ocrSkill; } Merge skill
In this department, you lot'll create a MergeSkill that merges the document content field with the text that was produced by the OCR skill.
private static MergeSkill CreateMergeSkill() { List<InputFieldMappingEntry> inputMappings = new Listing<InputFieldMappingEntry>(); inputMappings.Add together(new InputFieldMappingEntry("text") { Source = "/document/content" }); inputMappings.Add(new InputFieldMappingEntry("itemsToInsert") { Source = "/certificate/normalized_images/*/text" }); inputMappings.Add(new InputFieldMappingEntry("offsets") { Source = "/document/normalized_images/*/contentOffset" }); List<OutputFieldMappingEntry> outputMappings = new List<OutputFieldMappingEntry>(); outputMappings.Add(new OutputFieldMappingEntry("mergedText") { TargetName = "merged_text" }); MergeSkill mergeSkill = new MergeSkill(inputMappings, outputMappings) { Description = "Create merged_text which includes all the textual representation of each image inserted at the right location in the content field.", Context = "/document", InsertPreTag = " ", InsertPostTag = " " }; return mergeSkill; } Linguistic communication detection skill
The LanguageDetectionSkill detects the language of the input text and reports a unmarried language lawmaking for every document submitted on the request. Nosotros'll use the output of the Language Detection skill equally part of the input to the Text Split skill.
private static LanguageDetectionSkill CreateLanguageDetectionSkill() { List<InputFieldMappingEntry> inputMappings = new List<InputFieldMappingEntry>(); inputMappings.Add(new InputFieldMappingEntry("text") { Source = "/document/merged_text" }); List<OutputFieldMappingEntry> outputMappings = new List<OutputFieldMappingEntry>(); outputMappings.Add(new OutputFieldMappingEntry("languageCode") { TargetName = "languageCode" }); LanguageDetectionSkill languageDetectionSkill = new LanguageDetectionSkill(inputMappings, outputMappings) { Description = "Detect the language used in the document", Context = "/document" }; return languageDetectionSkill; } Text split skill
The beneath SplitSkill will carve up text by pages and limit the page length to 4,000 characters as measured by Cord.Length. The algorithm will try to split the text into chunks that are at most maximumPageLength in size. In this instance, the algorithm will do its best to break the sentence on a sentence purlieus, so the size of the chunk may be slightly less than maximumPageLength.
private static SplitSkill CreateSplitSkill() { Listing<InputFieldMappingEntry> inputMappings = new List<InputFieldMappingEntry>(); inputMappings.Add(new InputFieldMappingEntry("text") { Source = "/certificate/merged_text" }); inputMappings.Add(new InputFieldMappingEntry("languageCode") { Source = "/document/languageCode" }); List<OutputFieldMappingEntry> outputMappings = new List<OutputFieldMappingEntry>(); outputMappings.Add together(new OutputFieldMappingEntry("textItems") { TargetName = "pages", }); SplitSkill splitSkill = new SplitSkill(inputMappings, outputMappings) { Description = "Split content into pages", Context = "/document", TextSplitMode = TextSplitMode.Pages, MaximumPageLength = 4000, DefaultLanguageCode = SplitSkillLanguage.En }; return splitSkill; } Entity recognition skill
This EntityRecognitionSkill example is set to recognize category type organization. The EntityRecognitionSkill can also recognize category types person and location.
Notice that the "context" field is set to "/document/pages/*" with an asterisk, significant the enrichment step is chosen for each folio under "/certificate/pages".
private static EntityRecognitionSkill CreateEntityRecognitionSkill() { Listing<InputFieldMappingEntry> inputMappings = new List<InputFieldMappingEntry>(); inputMappings.Add together(new InputFieldMappingEntry("text") { Source = "/document/pages/*" }); Listing<OutputFieldMappingEntry> outputMappings = new List<OutputFieldMappingEntry>(); outputMappings.Add together(new OutputFieldMappingEntry("organizations") { TargetName = "organizations" }); EntityRecognitionSkill entityRecognitionSkill = new EntityRecognitionSkill(inputMappings, outputMappings) { Clarification = "Recognize organizations", Context = "/document/pages/*", DefaultLanguageCode = EntityRecognitionSkillLanguage.En }; entityRecognitionSkill.Categories.Add(EntityCategory.System); return entityRecognitionSkill; } Key phrase extraction skill
Like the EntityRecognitionSkill case that was just created, the KeyPhraseExtractionSkill is called for each folio of the document.
private static KeyPhraseExtractionSkill CreateKeyPhraseExtractionSkill() { List<InputFieldMappingEntry> inputMappings = new List<InputFieldMappingEntry>(); inputMappings.Add together(new InputFieldMappingEntry("text") { Source = "/document/pages/*" }); inputMappings.Add(new InputFieldMappingEntry("languageCode") { Source = "/document/languageCode" }); List<OutputFieldMappingEntry> outputMappings = new List<OutputFieldMappingEntry>(); outputMappings.Add(new OutputFieldMappingEntry("keyPhrases") { TargetName = "keyPhrases" }); KeyPhraseExtractionSkill keyPhraseExtractionSkill = new KeyPhraseExtractionSkill(inputMappings, outputMappings) { Description = "Extract the key phrases", Context = "/certificate/pages/*", DefaultLanguageCode = KeyPhraseExtractionSkillLanguage.En }; render keyPhraseExtractionSkill; } Build and create the skillset
Build the SearchIndexerSkillset using the skills y'all created.
private static SearchIndexerSkillset CreateOrUpdateDemoSkillSet(SearchIndexerClient indexerClient, IList<SearchIndexerSkill> skills,string cognitiveServicesKey) { SearchIndexerSkillset skillset = new SearchIndexerSkillset("demoskillset", skills) { Description = "Demo skillset", CognitiveServicesAccount = new CognitiveServicesAccountKey(cognitiveServicesKey) }; // Create the skillset in your search service. // The skillset does not need to be deleted if it was already created // since we are using the CreateOrUpdate method endeavor { indexerClient.CreateOrUpdateSkillset(skillset); } grab (RequestFailedException ex) { Panel.WriteLine("Failed to create the skillset\n Exception message: {0}\n", ex.Message); ExitProgram("Cannot continue without a skillset"); } return skillset; } Add together the following lines to Main.
// Create the skills Panel.WriteLine("Creating the skills..."); OcrSkill ocrSkill = CreateOcrSkill(); MergeSkill mergeSkill = CreateMergeSkill(); EntityRecognitionSkill entityRecognitionSkill = CreateEntityRecognitionSkill(); LanguageDetectionSkill languageDetectionSkill = CreateLanguageDetectionSkill(); SplitSkill splitSkill = CreateSplitSkill(); KeyPhraseExtractionSkill keyPhraseExtractionSkill = CreateKeyPhraseExtractionSkill(); // Create the skillset Panel.WriteLine("Creating or updating the skillset..."); List<SearchIndexerSkill> skills = new List<SearchIndexerSkill>(); skills.Add(ocrSkill); skills.Add(mergeSkill); skills.Add(languageDetectionSkill); skills.Add together(splitSkill); skills.Add(entityRecognitionSkill); skills.Add(keyPhraseExtractionSkill); SearchIndexerSkillset skillset = CreateOrUpdateDemoSkillSet(indexerClient, skills, cognitiveServicesKey); Step three: Create an index
In this section, you ascertain the index schema by specifying which fields to include in the searchable alphabetize, and the search attributes for each field. Fields take a type and can take attributes that determine how the field is used (searchable, sortable, so along). Field names in an index are not required to identically match the field names in the source. In a later on step, you add field mappings in an indexer to connect source-destination fields. For this step, define the alphabetize using field naming conventions pertinent to your search application.
This practice uses the following fields and field types:
| Field names | Field types |
|---|---|
id | Edm.Cord |
content | Edm.Cord |
languageCode | Edm.String |
keyPhrases | List<Edm.Cord> |
organizations | List<Edm.String> |
Create DemoIndex Form
The fields for this index are defined using a model class. Each property of the model grade has attributes which determine the search-related behaviors of the corresponding alphabetize field.
We'll add together the model class to a new C# file. Right click on your project and select Add > New Detail..., select "Grade" and proper noun the file DemoIndex.cs, and so select Add together.
Make certain to indicate that y'all want to employ types from the Azure.Search.Documents.Indexes and System.Text.Json.Serialization namespaces.
Add together the below model grade definition to DemoIndex.cs and include it in the same namespace where you'll create the index.
using Azure.Search.Documents.Indexes; using Arrangement.Text.Json.Serialization; namespace EnrichwithAI { // The SerializePropertyNamesAsCamelCase is currently unsupported as of this writing. // Replace it with JsonPropertyName public class DemoIndex { [SearchableField(IsSortable = true, IsKey = truthful)] [JsonPropertyName("id")] public string Id { become; set; } [SearchableField] [JsonPropertyName("content")] public string Content { become; set; } [SearchableField] [JsonPropertyName("languageCode")] public cord LanguageCode { get; gear up; } [SearchableField] [JsonPropertyName("keyPhrases")] public string[] KeyPhrases { get; set; } [SearchableField] [JsonPropertyName("organizations")] public cord[] Organizations { get; fix; } } } Now that you've divers a model class, back in Plan.cs you can create an index definition fairly hands. The name for this alphabetize volition be demoindex. If an alphabetize already exists with that name, it will be deleted.
private static SearchIndex CreateDemoIndex(SearchIndexClient indexClient) { FieldBuilder architect = new FieldBuilder(); var index = new SearchIndex("demoindex") { Fields = builder.Build(typeof(DemoIndex)) }; try { indexClient.GetIndex(index.Name); indexClient.DeleteIndex(index.Name); } catch (RequestFailedException ex) when (ex.Status == 404) { //if the specified index not be, 404 volition be thrown. } endeavor { indexClient.CreateIndex(index); } grab (RequestFailedException ex) { Console.WriteLine("Failed to create the index\n Exception message: {0}\n", ex.Bulletin); ExitProgram("Cannot continue without an index"); } return index; } During testing, y'all may find that you're attempting to create the index more than than in one case. Because of this, check to see if the alphabetize that you're about to create already exists before attempting to create it.
Add together the post-obit lines to Main.
// Create the index Console.WriteLine("Creating the index..."); SearchIndex demoIndex = CreateDemoIndex(indexClient); Add the following using statement to resolve the disambiguate reference.
using Index = Azure.Search.Documents.Indexes.Models; To learn more almost index concepts, see Create Index (REST API).
Step iv: Create and run an indexer
So far you lot take created a data source, a skillset, and an index. These three components become part of an indexer that pulls each piece together into a single multi-phased operation. To tie these together in an indexer, you must define field mappings.
-
The fieldMappings are processed earlier the skillset, mapping source fields from the data source to target fields in an index. If field names and types are the same at both ends, no mapping is required.
-
The outputFieldMappings are processed later on the skillset, referencing sourceFieldNames that don't exist until document cracking or enrichment creates them. The targetFieldName is a field in an index.
In addition to hooking up inputs to outputs, you can also utilize field mappings to flatten information structures. For more than information, see How to map enriched fields to a searchable alphabetize.
private static SearchIndexer CreateDemoIndexer(SearchIndexerClient indexerClient, SearchIndexerDataSourceConnection dataSource, SearchIndexerSkillset skillSet, SearchIndex index) { IndexingParameters indexingParameters = new IndexingParameters() { MaxFailedItems = -1, MaxFailedItemsPerBatch = -1, }; indexingParameters.Configuration.Add("dataToExtract", "contentAndMetadata"); indexingParameters.Configuration.Add("imageAction", "generateNormalizedImages"); SearchIndexer indexer = new SearchIndexer("demoindexer", dataSource.Name, index.Name) { Clarification = "Demo Indexer", SkillsetName = skillSet.Proper name, Parameters = indexingParameters }; FieldMappingFunction mappingFunction = new FieldMappingFunction("base64Encode"); mappingFunction.Parameters.Add("useHttpServerUtilityUrlTokenEncode", true); indexer.FieldMappings.Add together(new FieldMapping("metadata_storage_path") { TargetFieldName = "id", MappingFunction = mappingFunction }); indexer.FieldMappings.Add together(new FieldMapping("content") { TargetFieldName = "content" }); indexer.OutputFieldMappings.Add(new FieldMapping("/certificate/pages/*/organizations/*") { TargetFieldName = "organizations" }); indexer.OutputFieldMappings.Add(new FieldMapping("/document/pages/*/keyPhrases/*") { TargetFieldName = "keyPhrases" }); indexer.OutputFieldMappings.Add together(new FieldMapping("/document/languageCode") { TargetFieldName = "languageCode" }); try { indexerClient.GetIndexer(indexer.Name); indexerClient.DeleteIndexer(indexer.Name); } catch (RequestFailedException ex) when (ex.Condition == 404) { //if the specified indexer not be, 404 volition be thrown. } try { indexerClient.CreateIndexer(indexer); } catch (RequestFailedException ex) { Console.WriteLine("Failed to create the indexer\n Exception message: {0}\northward", ex.Message); ExitProgram("Cannot go along without creating an indexer"); } return indexer; } Add the following lines to Main.
// Create the indexer, map fields, and execute transformations Console.WriteLine("Creating the indexer and executing the pipeline..."); SearchIndexer demoIndexer = CreateDemoIndexer(indexerClient, dataSource, skillset, demoIndex); Expect indexer processing to take some time to complete. Fifty-fifty though the data set is minor, analytical skills are ciphering-intensive. Some skills, such as paradigm analysis, are long-running.
Tip
Creating an indexer invokes the pipeline. If there are problems reaching the data, mapping inputs and outputs, or society of operations, they appear at this stage.
Explore creating the indexer
The code sets "maxFailedItems" to -one, which instructs the indexing engine to ignore errors during data import. This is useful because there are so few documents in the demo data source. For a larger data source, you would set the value to greater than 0.
Also notice the "dataToExtract" is set up to "contentAndMetadata". This statement tells the indexer to automatically extract the content from dissimilar file formats besides as metadata related to each file.
When content is extracted, you lot tin prepare imageAction to extract text from images institute in the data source. The "imageAction" set to "generateNormalizedImages" configuration, combined with the OCR Skill and Text Merge Skill, tells the indexer to extract text from the images (for example, the discussion "cease" from a traffic Stop sign), and embed it as part of the content field. This behavior applies to both the images embedded in the documents (retrieve of an image inside a PDF), as well as images institute in the information source, for example a JPG file.
4 - Monitor indexing
Once the indexer is defined, it runs automatically when yous submit the request. Depending on which cerebral skills you defined, indexing can take longer than you lot wait. To find out whether the indexer is still running, apply the GetStatus method.
private static void CheckIndexerOverallStatus(SearchIndexerClient indexerClient, SearchIndexer indexer) { try { var demoIndexerExecutionInfo = indexerClient.GetIndexerStatus(indexer.Name); switch (demoIndexerExecutionInfo.Value.Status) { case IndexerStatus.Mistake: ExitProgram("Indexer has fault status. Check the Azure Portal to further understand the error."); suspension; case IndexerStatus.Running: Console.WriteLine("Indexer is running"); break; case IndexerStatus.Unknown: Console.WriteLine("Indexer status is unknown"); pause; default: Panel.WriteLine("No indexer information"); intermission; } } take hold of (RequestFailedException ex) { Panel.WriteLine("Failed to become indexer overall condition\n Exception message: {0}\due north", ex.Message); } } demoIndexerExecutionInfo represents the current status and execution history of an indexer.
Warnings are common with some source file and skill combinations and do not ever signal a problem. In this tutorial, the warnings are benign (for case, no text inputs from the JPEG files).
Add the following lines to Main.
// Cheque indexer overall status Panel.WriteLine("Check the indexer overall status..."); CheckIndexerOverallStatus(indexerClient, demoIndexer); 5 - Search
In Azure Cognitive Search tutorial console apps, nosotros typically add together a 2-second delay before running queries that return results, simply because enrichment takes several minutes to complete, we'll close the console app and apply another approach instead.
The easiest option is Search explorer in the portal. You can first run an empty query that returns all documents, or a more targeted search that returns new field content created past the pipeline.
-
In Azure portal, in the search Overview page, select Indexes.
-
Detect
demoindexin the listing. Information technology should take 14 documents. If the document count is nothing, the indexer is either still running or the page hasn't been refreshed however. -
Select
demoindex. Search explorer is the start tab. -
Content is searchable as soon as the first document is loaded. To verify content exists, run an unspecified query by clicking Search. This query returns all currently indexed documents, giving you an idea of what the index contains.
-
Adjacent, paste in the post-obit cord for more manageable results:
search=*&$select=id, languageCode, organizations
Reset and rerun
In the early experimental stages of development, the most practical approach for blueprint iteration is to delete the objects from Azure Cerebral Search and allow your code to rebuild them. Resources names are unique. Deleting an object lets you recreate it using the aforementioned proper name.
The sample code for this tutorial checks for existing objects and deletes them and so that you tin can rerun your lawmaking. You can also use the portal to delete indexes, indexers, data sources, and skillsets.
Takeaways
This tutorial demonstrated the bones steps for building an enriched indexing pipeline through the creation of component parts: a data source, skillset, index, and indexer.
Built-in skills were introduced, along with skillset definition and the mechanics of chaining skills together through inputs and outputs. You lot also learned that outputFieldMappings in the indexer definition is required for routing enriched values from the pipeline into a searchable index on an Azure Cerebral Search service.
Finally, y'all learned how to exam results and reset the system for further iterations. You learned that issuing queries against the index returns the output created by the enriched indexing pipeline. Yous also learned how to cheque indexer status, and which objects to delete before rerunning a pipeline.
Clean up resources
When yous're working in your own subscription, at the end of a project, it's a practiced idea to remove the resources that you lot no longer demand. Resource left running can cost y'all money. You can delete resources individually or delete the resources group to delete the unabridged gear up of resources.
You can observe and manage resources in the portal, using the All resources or Resource groups link in the left-navigation pane.
Side by side steps
At present that you're familiar with all of the objects in an AI enrichment pipeline, allow'south accept a closer look at skillset definitions and private skills.
Feedback
Submit and view feedback for
pruittsituall1936.blogspot.com
Source: https://docs.microsoft.com/en-us/azure/search/cognitive-search-tutorial-blob-dotnet
0 Response to "Upload Images Azure Blob Net Core Entity Framework Transaction"
Post a Comment